Optonet Vision Unit Documentation

1.4.Step 4. Remote Control
The Optonet Vision Unit allows different options for remote control:
Mouse
Useful to first explore the OVU, but not a practical option for distant vision charts, as it is difficult to see the small cursor from afar.
Keyboard
A keyboard is a good option to handle the Optonet Vision Unit. The four arrows, together with the Intro/OK key and the Page Down y Page Up (Sequences) buttons are enough to manage most common functions.
Additionally, each function has a designated letter from the keyboard. You can find out the letter for a given function on the Tools Menu at the right side of each chart.
E.g.: Pressing “M” opens the main Tests Menu, then the arrows will take us from test to test, and Intro will select one. All these keys are easily accessible in mini Wireless keyboards, like the one shown here:

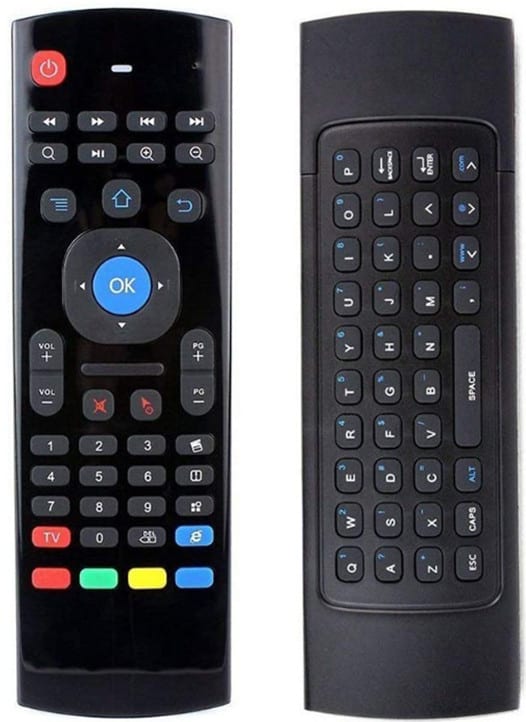
Remote Controller
The recommended Android TV includes a remote controller that has been programmed for easy managing of OVU menus. The following image represents the functions assigned to each button

Tablet for remote control
A tablet can be linked to the computer that displays the distance vision unit, to take remote control of the menus. This is the most popular option. It can be activated as follows:
– Go to your tablet store and install the Optonet Vision Unit. You will need your login details to enter it.
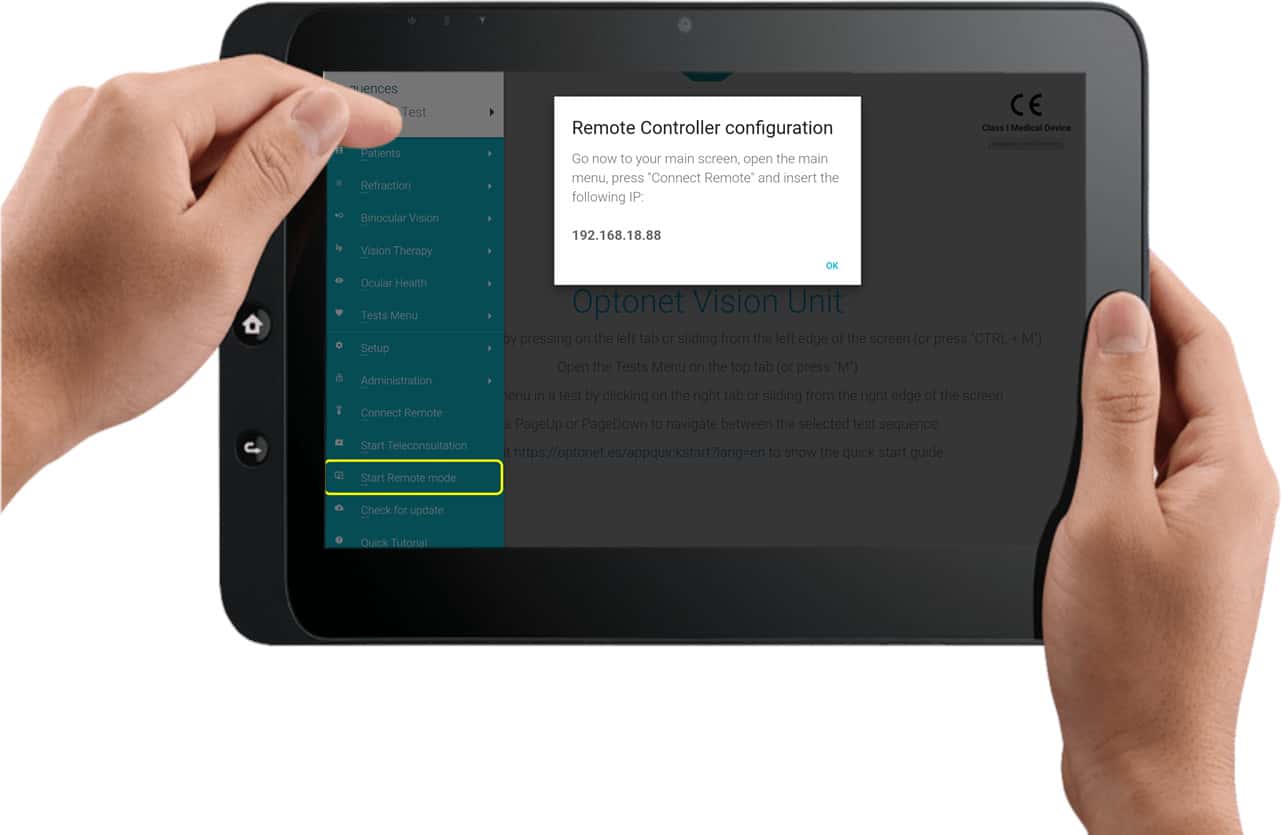
– Open the main menu on the left (in the tablet) and click on the option: Start Remote mode and a message with instructions and a IP number will appear on the Tablet screen:
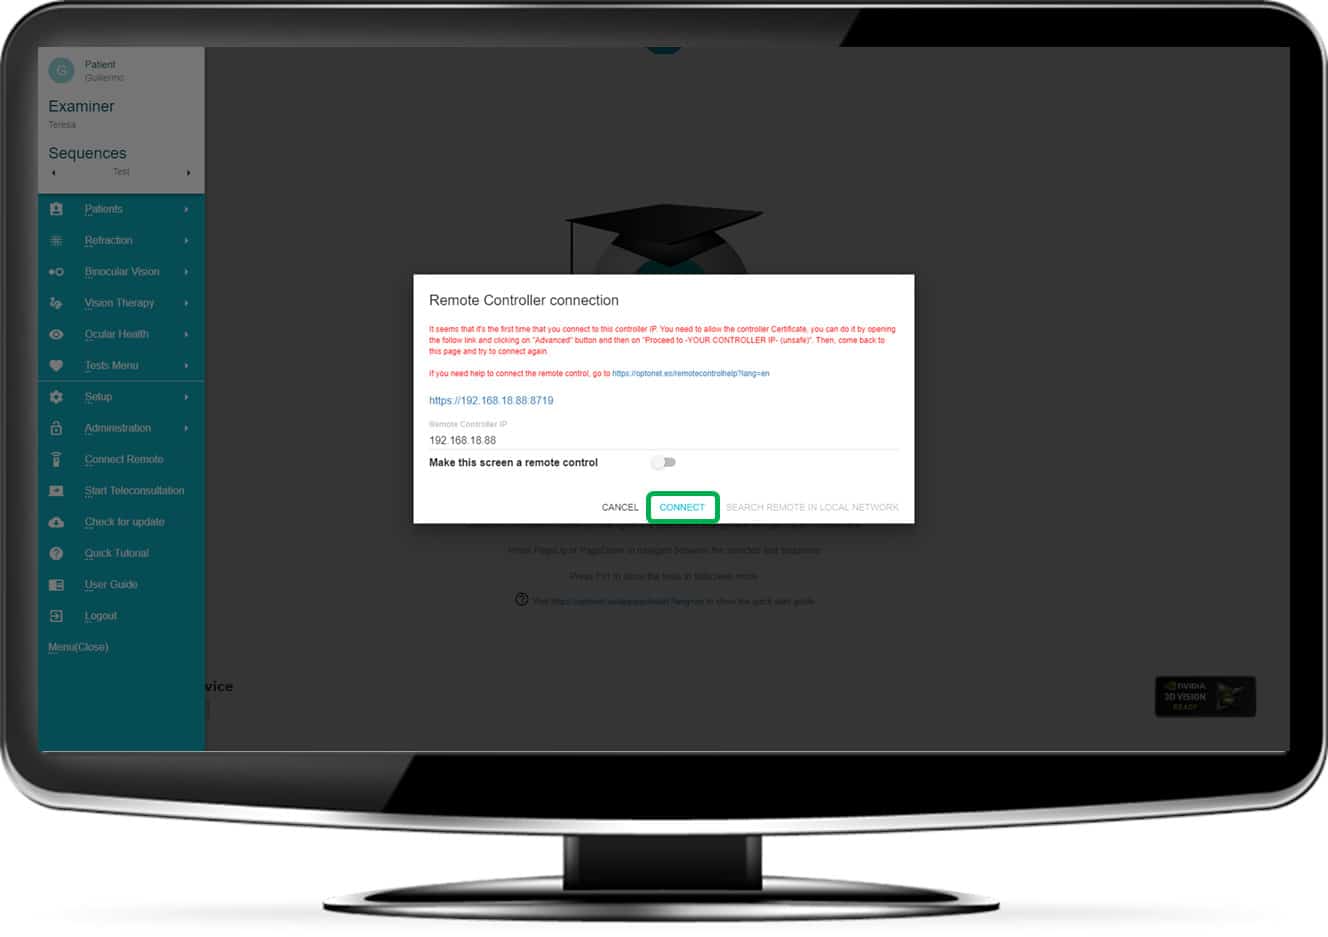
– In the distance vision unit open the option: Connect Remote from the left menu; insert the IP number from the Tablet and press Connect:

Handling Distance Vision Tests
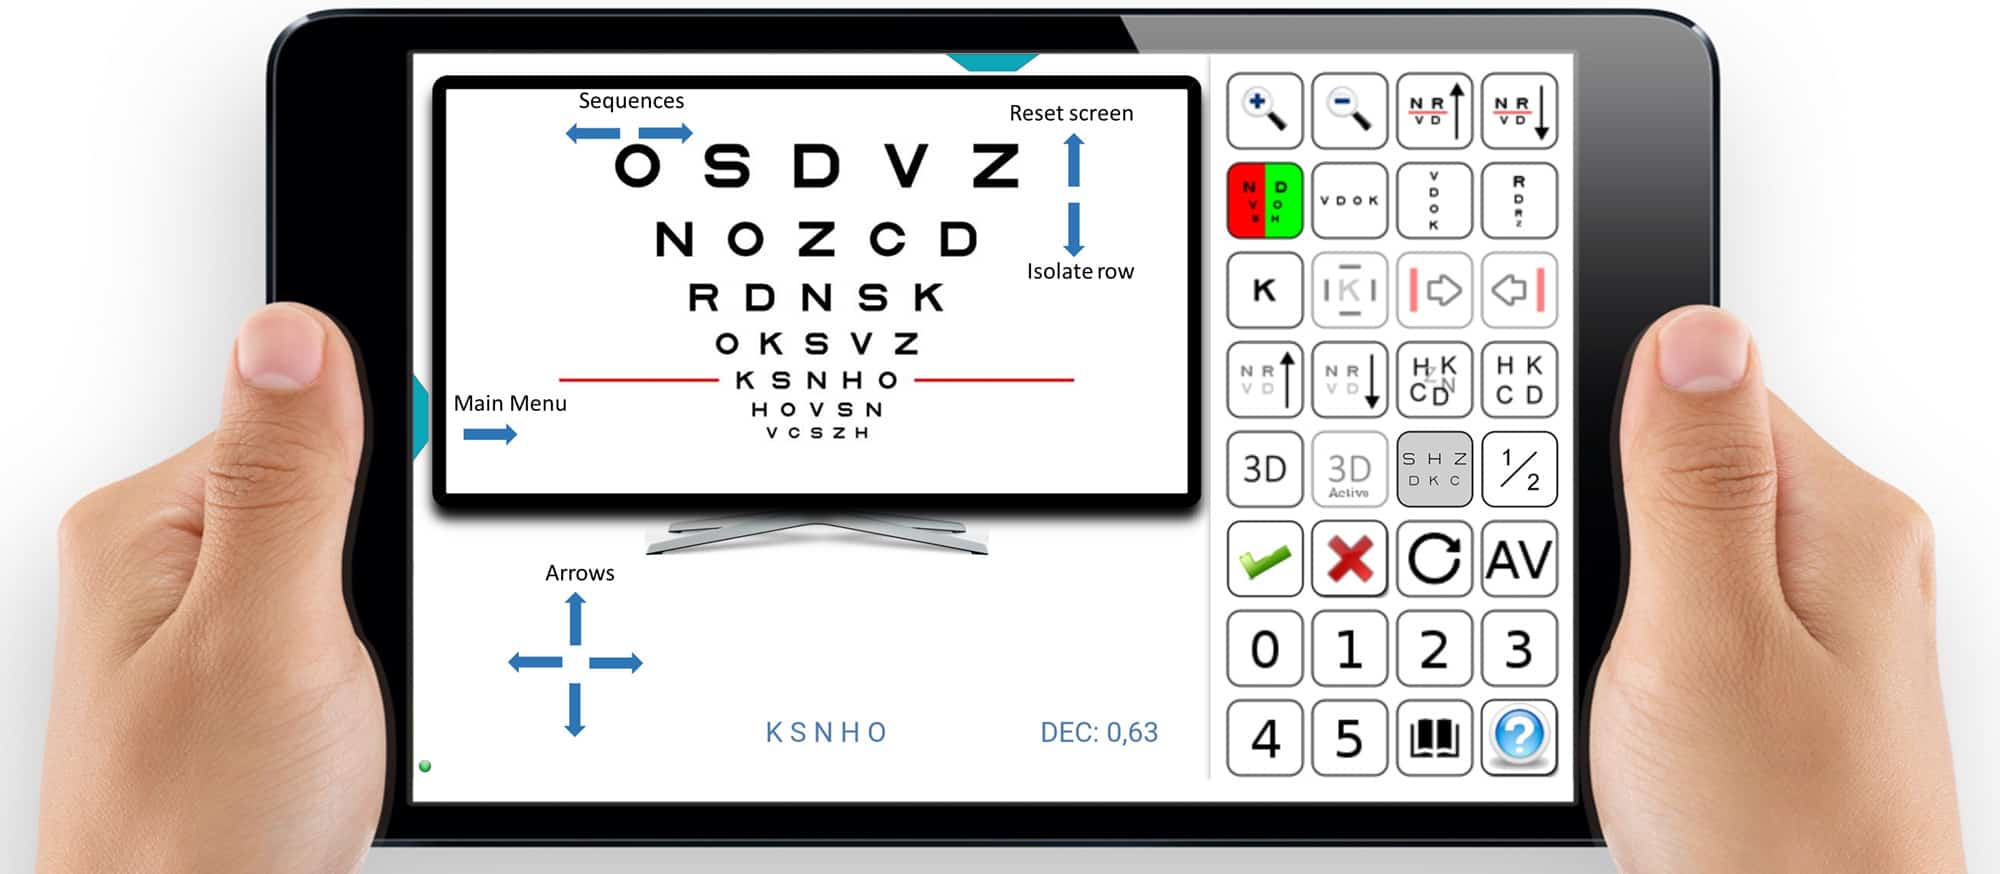
From here onwards, you can navigate through the menus from the Tablet, which will automatically synchronize with the charts displayed for distance vision testing. On the right side there are the options for the test displayed, whilst on the left side we can see the same image shown to the patient on the distance vision screen.

The small tab on the top gives access to the test menu, whilst the one on the left opens the main menu. The gestures can also be used with the tablet.
A reminder of the gestures is displayed in the following image: ![]()
On subsequent connexions between both apparatus, we will just press on Start Remote mode on the tablet, and Connect Remote on the distance vision screen. The IP address is also automatically stored in memory.
Note only for Windows OS
The first time a remote connection is established in Windows through Chrome the browser will ask permission to connect with the tablet (but never again).
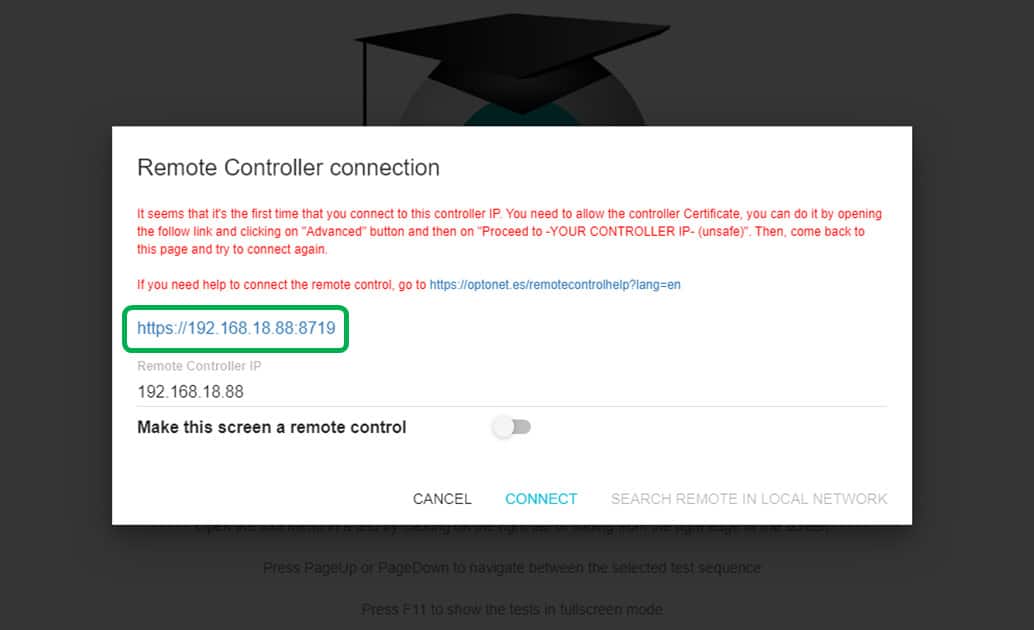
To grant permission, click on the blue link in the previous image to open a new window in the browser (Chrome).
Then, click on Advanced configuration and then on the link: Proceed to 192.168…(unsafe)
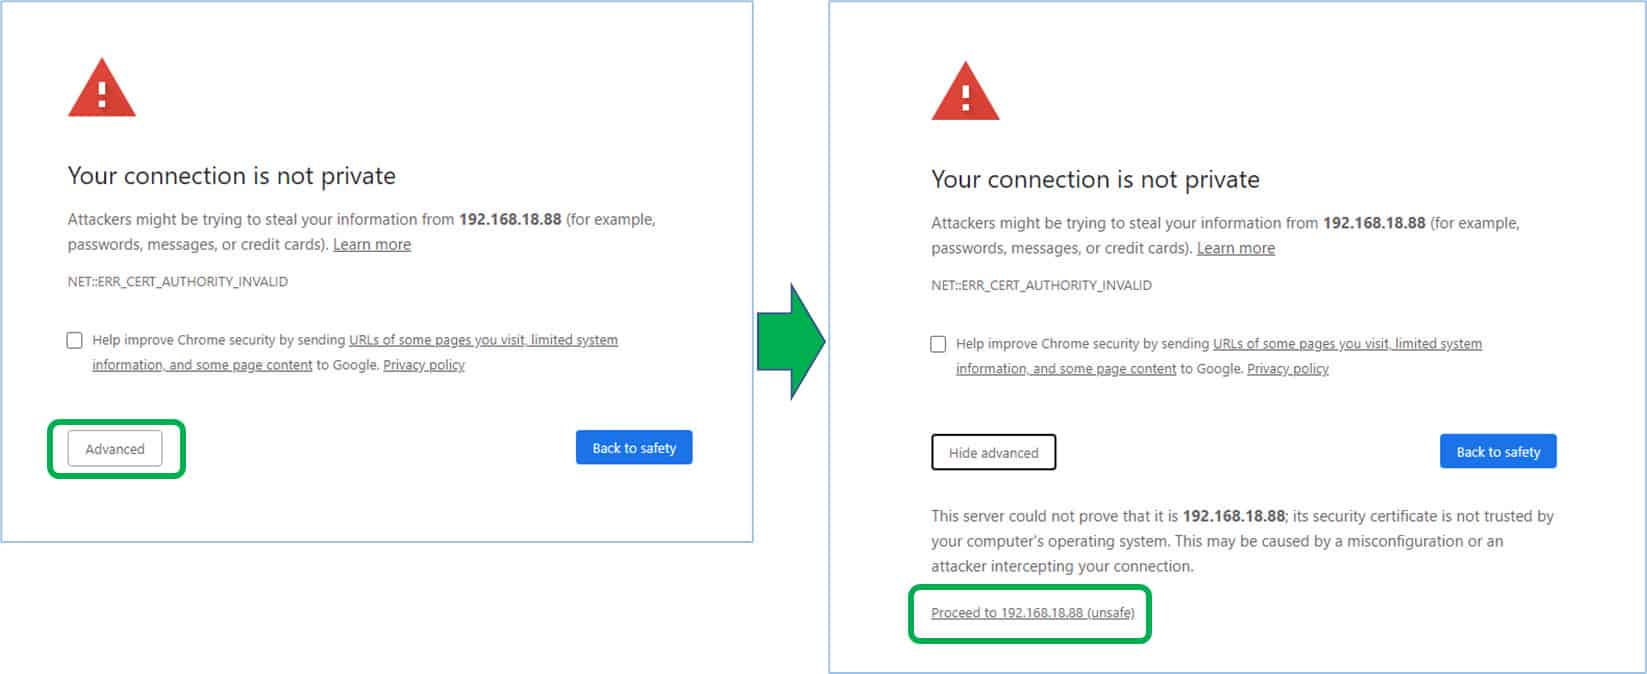
Finally, you will be directed to a blank Screen with the following message (which seems a bit odd):

This means the connection has been successfully authorized.
And that is all! Close that Chrome window, to go back to the distance vision unit and click again on Connect.