Optonet Vision Unit Documentation

2.Tele-Consultation
The Optonet Vision Unit (OVU) allows displaying high-quality vision tests on the patient’s computer or tablet at home, to evaluate their visual function. The charts are fully controlled remotely by the practitioner, but without getting access to the patient’s computer (thus there is no risk to their privacy).
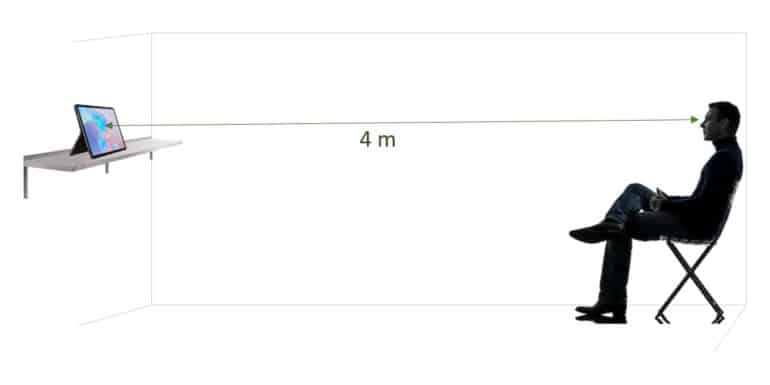
Phone communication is ideal during consultation to guide the patient through the visual assessment. The patient should be asked in advance to have a measuring tape at hand (maybe also a ruler), and to find a place in their home where they can view their computer or tablet from a 3 – 4 meters distance (10 -12 feet).
Professional: Open the OVU in your computer and press F11 to enable full screen. Open the main menu on the left, select the patient from the database (the patient’s record should have been stored beforehand), and click on “Start TeleConsultation” option from the main menu:
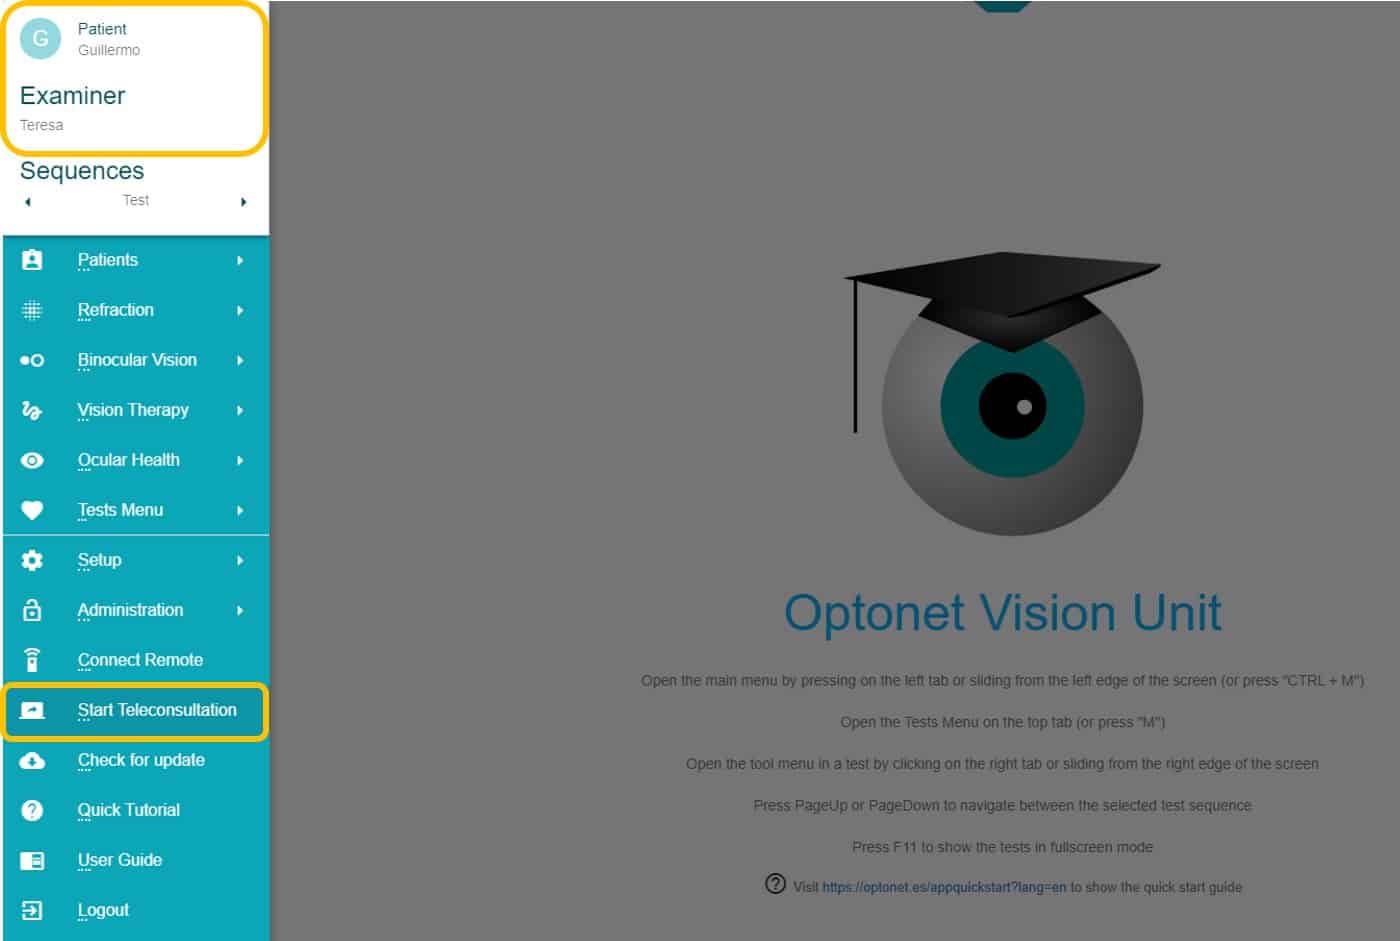
Note: whenever attempting to start a tele-consultation without first selecting a patient, the program will re-direct the user to the patient database, to select one.
A new window will then appear with instructions for the patient on how to open the app in their computer. We can present the patient with two simple choices:
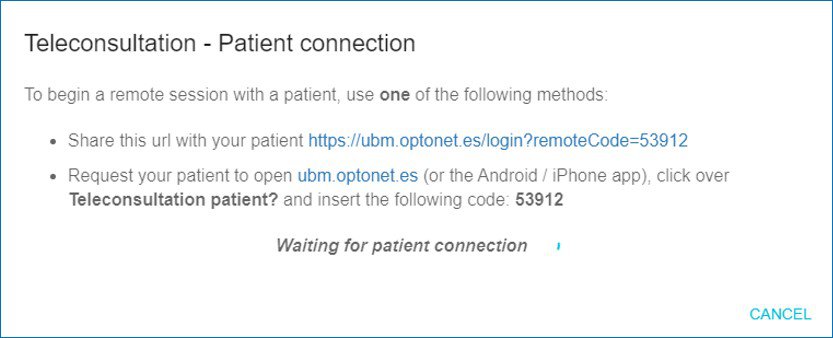
- A direct URL link may be forwarded to the patient by e-mail (just copy and paste the link displayed in the window)
- Alternatively, the patient can go to the Optonet Vision Unit webpage: ubm.optonet.es, click the link Teleconsultation patient?:

then insert the 5-digit code displayed in the professional’s screen, and click on enter:

That is all! Once the patient is linked, the menu for remotely controlling the OVU tests will appear on the professional’s screen, together with the replica of the chart showed on the patient’s screen at any time.
If the patient chooses to use a tablet (either Android or iPad) they will have to download the app from their relevant app store and launch it, before they can follow the above-mentioned steps.
However, whenever possible we recommend the use of a computer, as tablets tend to be slower for loading and displaying the charts.
Calibration
Instructions to the Patient:
– If using a computer (not a tablet) press on F11 (usually on the top-right of the keyboard) to display the tests on full screen.
– The Unit opens first to the calibration screen. Please measure the width of the letter H shown, by placing the ruler or measuring tape directly against the screen (left to right).
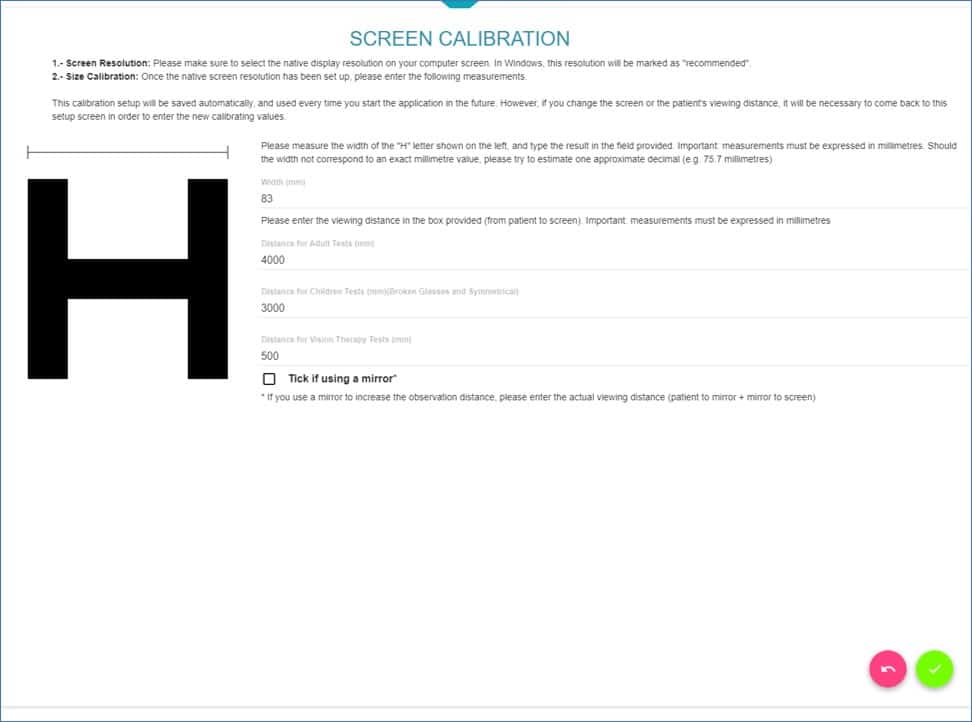
The patient should then let us know that measurement in centimetres or millimetres (but not inches), so that we can introduce the correct number – in millimetres – in our computer.
Once this is completed, we will ask the patient to get away from the screen and measure the distance between the screen and their forehead (they may need help form a relative to do this). Ideally, the distance should be between 3 or 4 metres (10 to 13 feet).
The practitioner must then input that distance into the corresponding box in millimetres (e.g. 3,56 metres correspond to 3560 mm).
And that is all! We are now ready to display the vision charts for the patient. We must stress to the patient the importance of remaining at the same viewing distance at all times, refraining to lean forward.
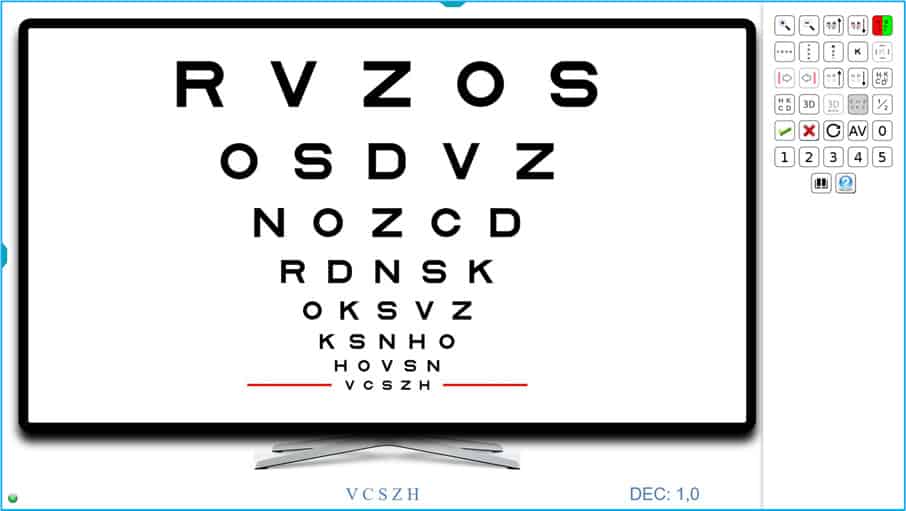
The left side of the professional’s screen will show a replica of the tests displayed on the patient’s screen on real time; whilst the menus to control the charts will appear on the right side. The Optonet Vision unit offers an extensive variety of charts and options (logMAR VA, refraction charts such as red/green or fan and block, contrast sensitivity, stereo acuity, children’s VA, or even vanishing optotypes… etc)
The menus offer an ample array of options to assist testing, form isolated rows or letters, side red lines to point to a line, arrows to point to single letters… etc. The Unit also incorporates a simple-to-use automated system to measure logMAR VA (explained at the end of this guide). We can also choose from various notation systems to express VA values.
Once completed the distance visual assessment, we can move to near vision testing. We may ask the patient to sit at their normal distance to the computer or tablet, and again to measure the distance from the screen to their forehead. Near vision distance is usually around 40 – 50 cm.
The professional will have to open the main menu on the left, choose Setup and click on Screen. There we can change to the near viewing, by introducing the distance indicated by the patient (in millimitres: e.g. 470 mm).
We can then proceed to show near vision tests such as Amsler grid or red saturation charts.
The Unit also contains a complete suit of test for binocular vision assessment (fixation disparity, suppression, stereopsis, aniseikonia, Hess-Lancaster like for motor evaluation… etc), but those require the use of red/blue filters (which are rather inexpensive and could be posted beforehand if required).
Once we complete the visual assessment, we just have to click on End Teleconsultation to close de connection.
Please note that Optonet has developed a secure connection, and that neither party has access to the other computer in any way during the consultation, so there is no risk of privacy breach involved.